
You've probably been asked by clients to display article rankings.
When displaying microCMS article rankings on a Jamstack site, creating a dedicated API is the typical approach.
But if you've run out of API slots and still want to implement it, writing PV numbers directly into existing article content is another option.
This time, we'll introduce an implementation example using that approach on a site we're publishing with microCMS + Cloudflare Pages using SSG!
Cloudflare has become known among the general public in a rather unusual way, but this is actually something our company is testing on our own site based on client requests! https://www.liberogic.jp/topics/
When This Approach Works Well
- When you want to display a TOP 10 ranking in a sidebar or footer
- When real-time updates are not a priority
- When you're low on microCMS API slots
- When you want to implement simply with static site generation (SSG)
Step 1: Preparing microCMS (API schema extension and Webhook control)
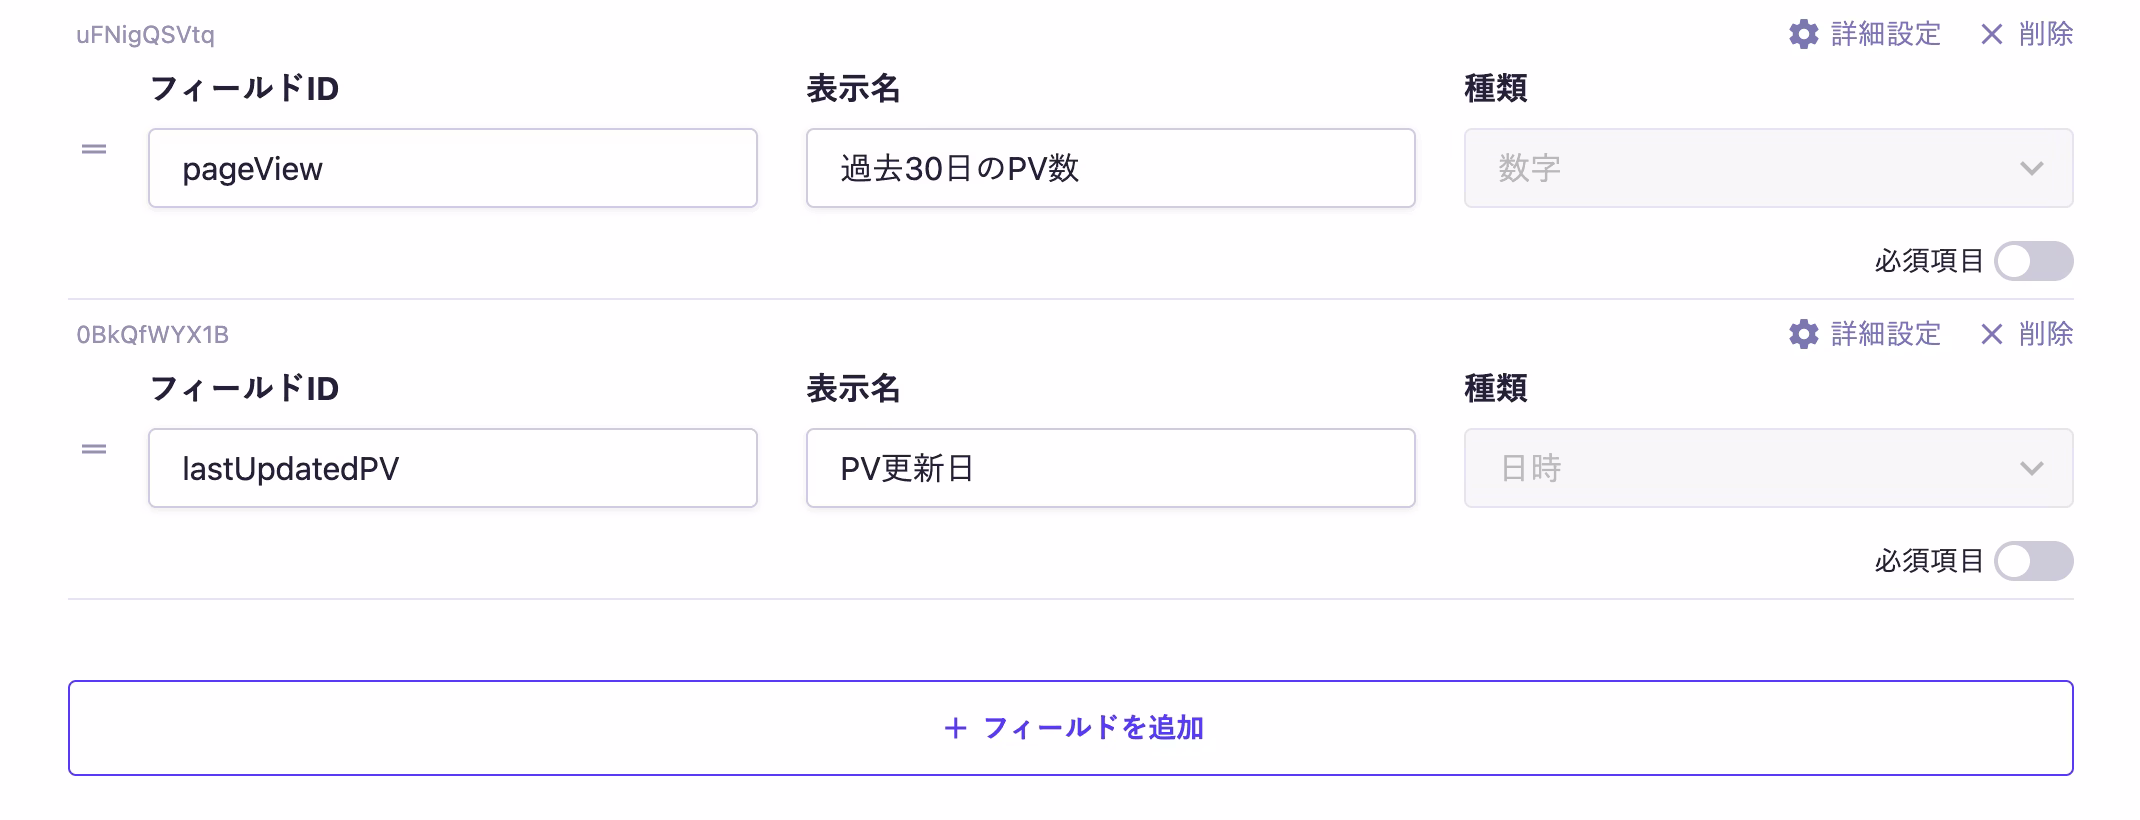
1-1. Extending the API schema
Add two fields for ranking to your existing article endpoint.
pageView(number): Stores the cumulative page views from GA4 for the past 30 days.lastUpdatedPV(datetime): Records the date and time when the page views were last updated.
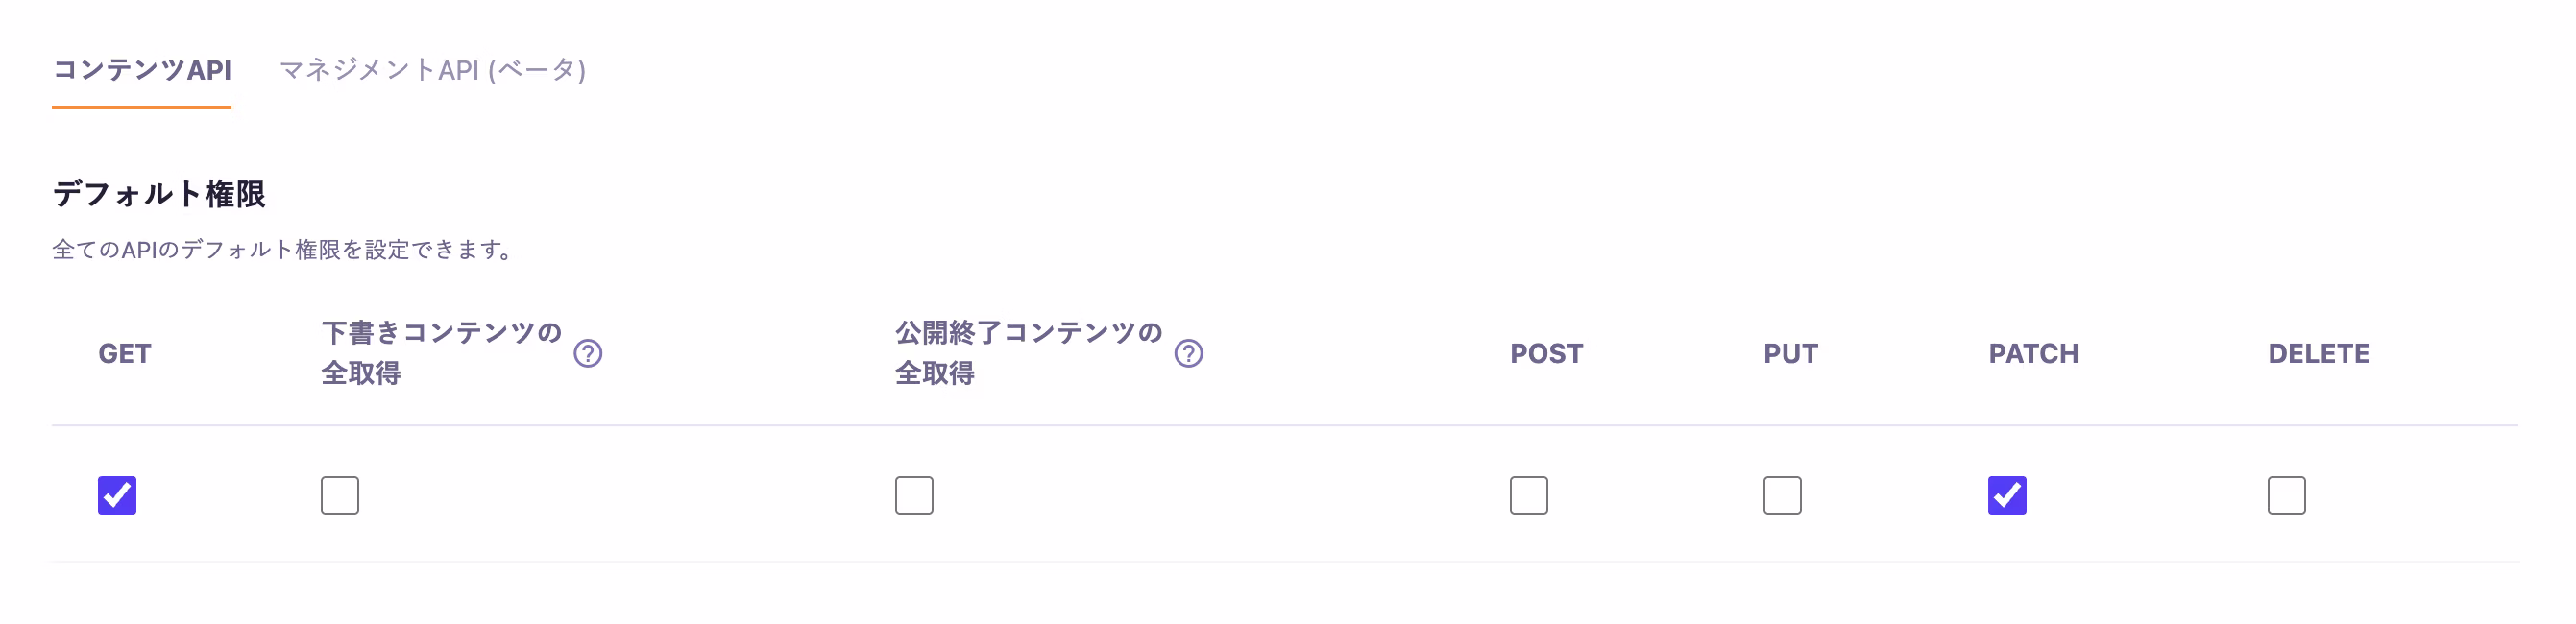
1-2. Setting API key permissions
In the API key settings, check the PATCH option.
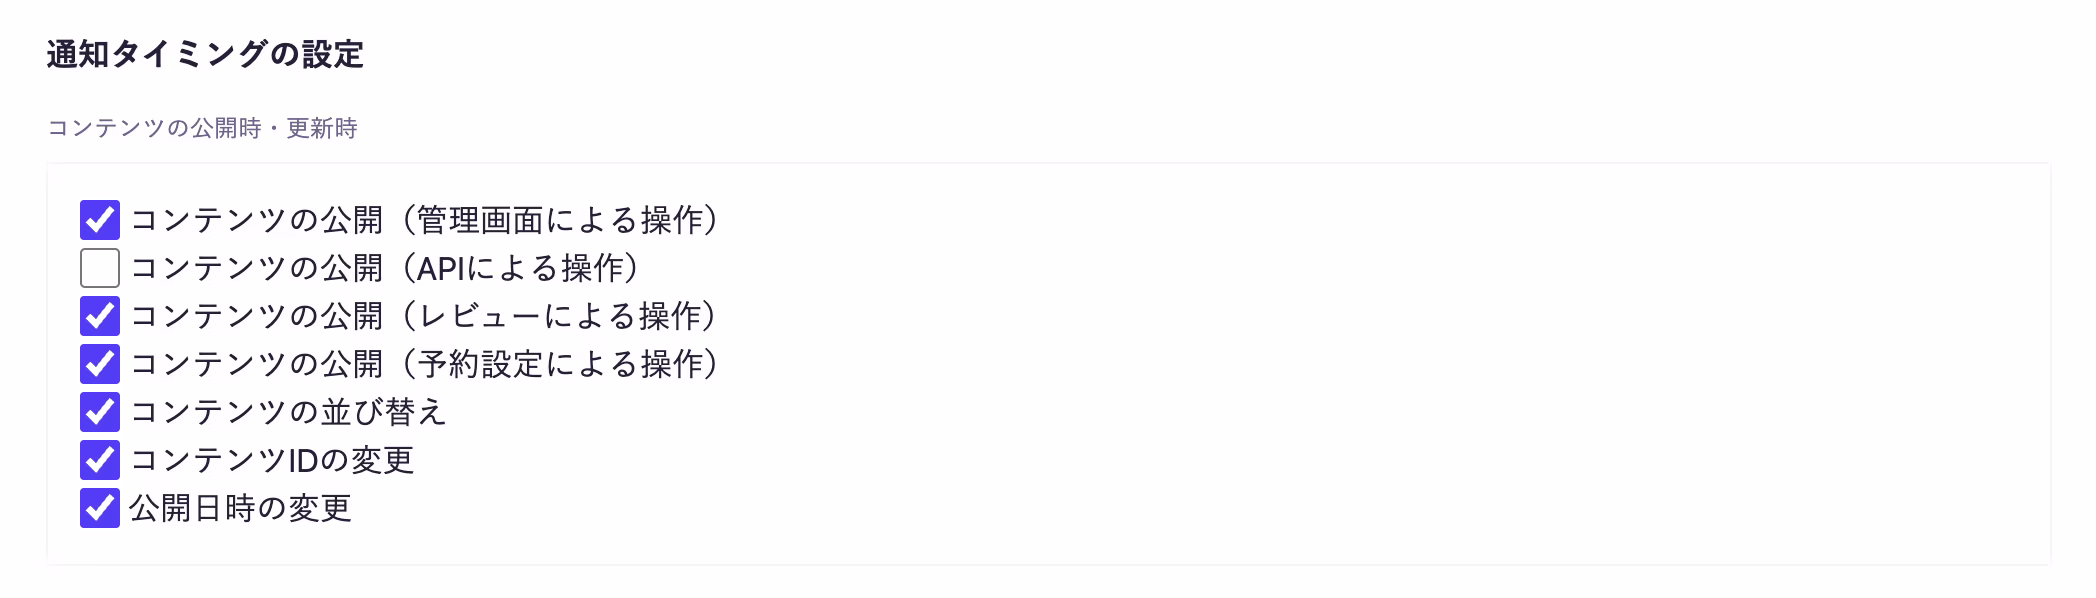
1-3. Configuring Webhooks (avoiding excessive builds)
To prevent builds from triggering repeatedly when page view counts are updated for each article, uncheck Content publication (via API) from the Webhook triggers.
Step 2: Authentication Setup in Google Cloud Console
To access from Cloudflare Workers, prepare a service account and Data API.
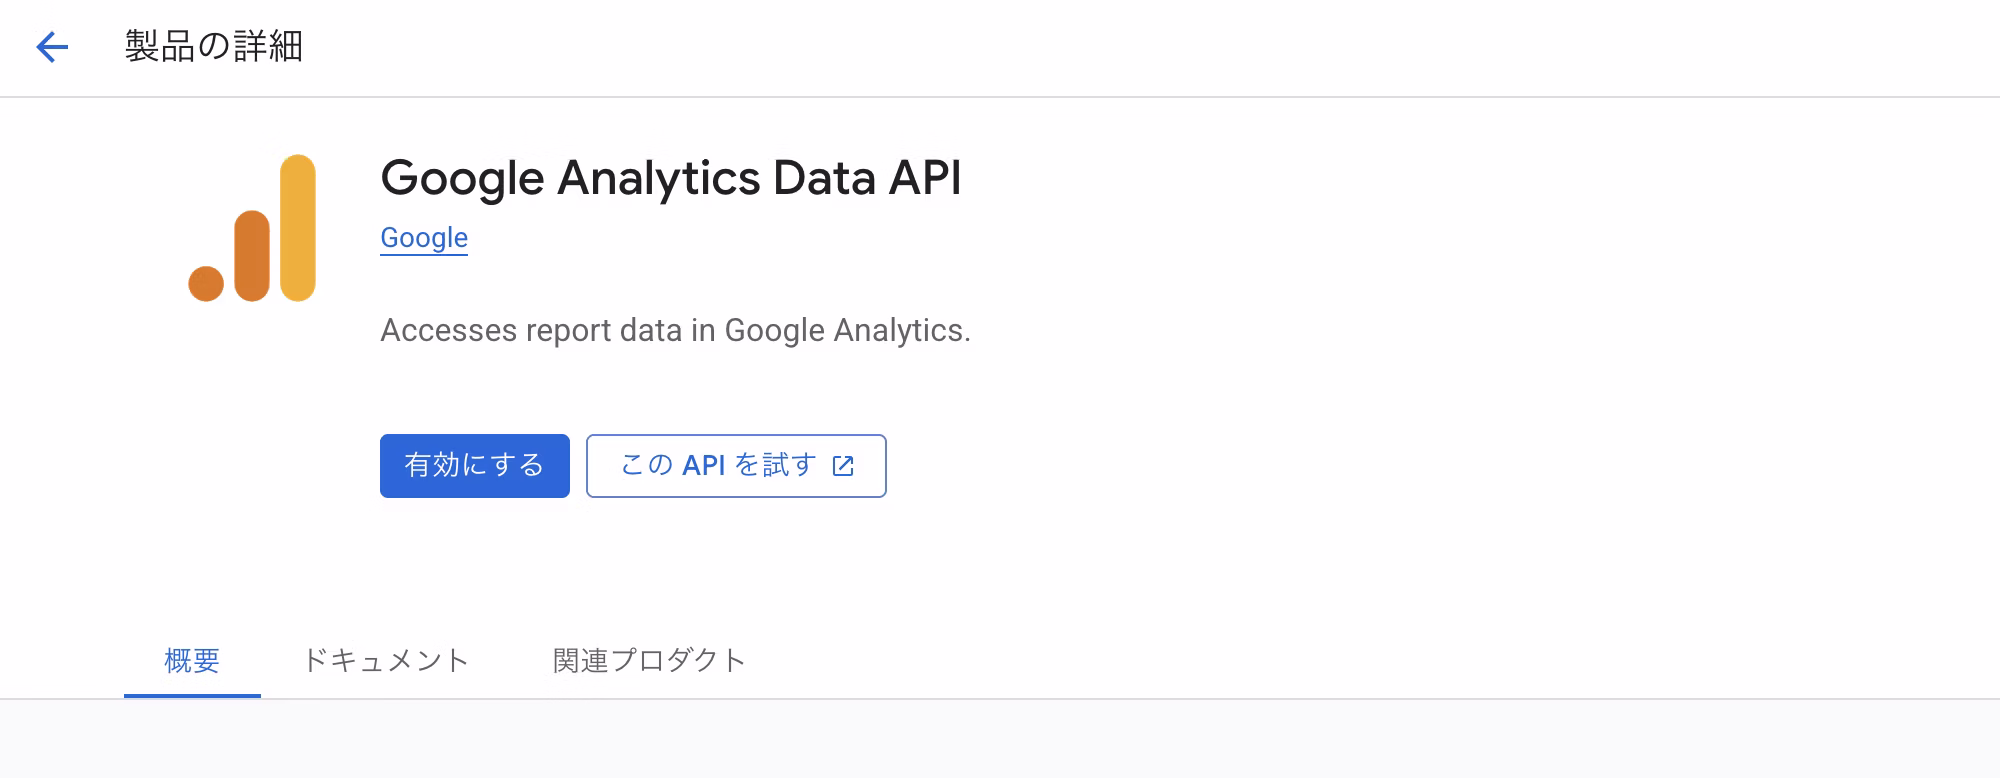
2-1. Enable the API
In your Google Cloud Console project, enable Google Analytics Data API.
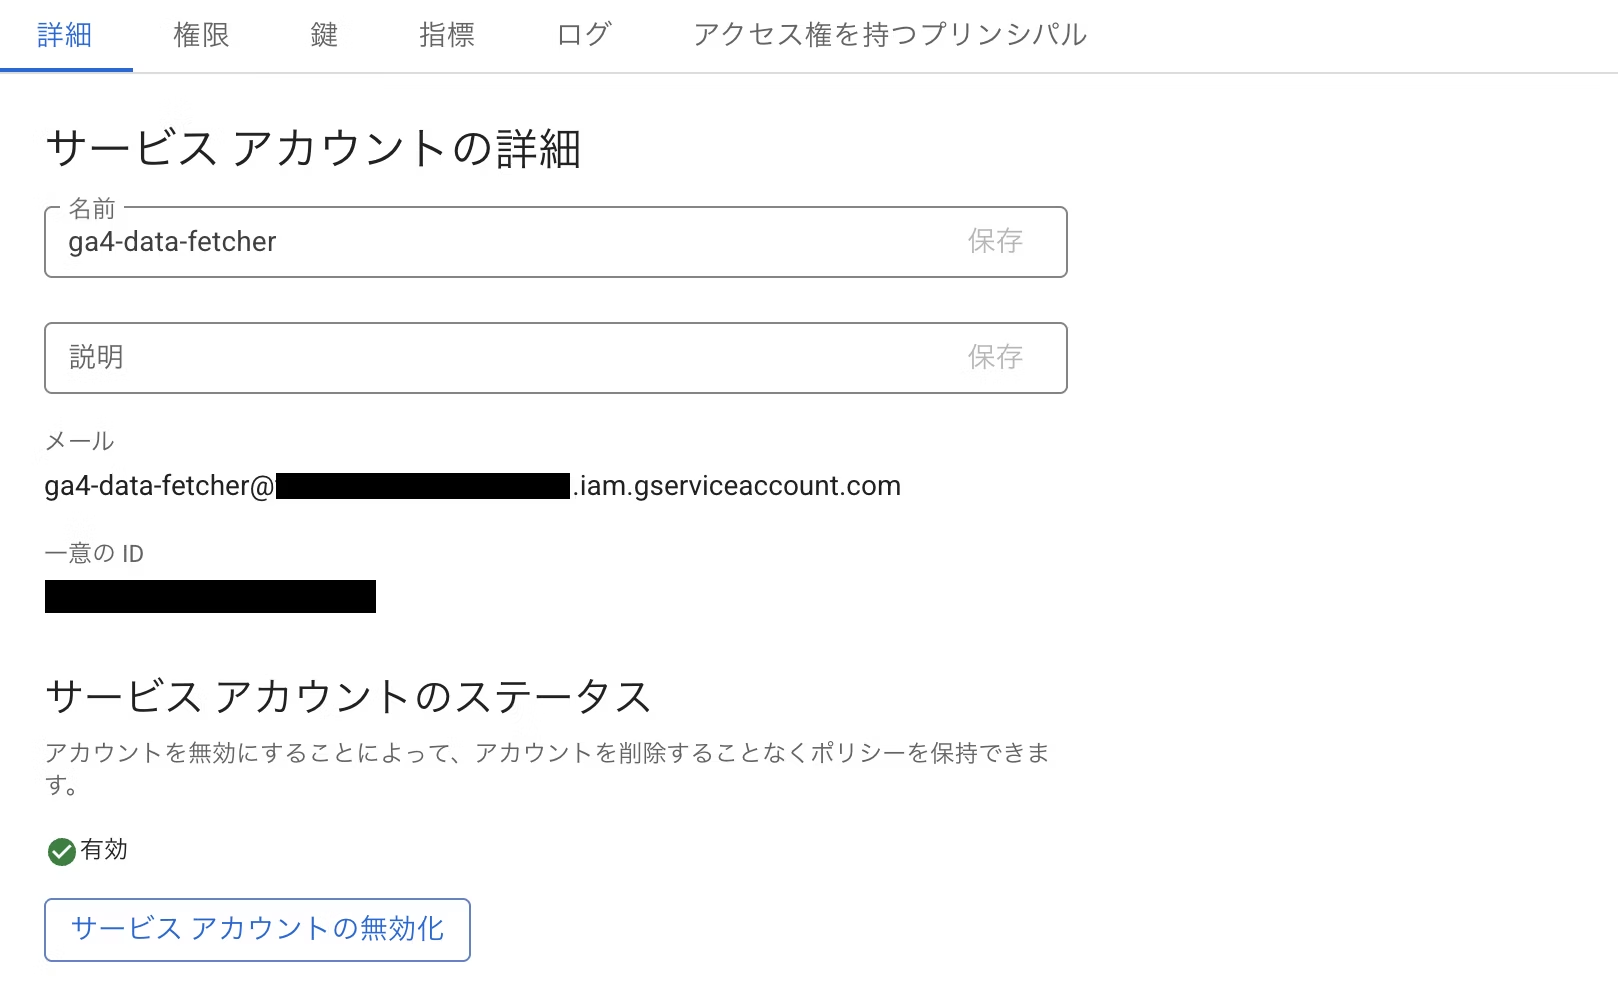
2-2. Create Service Account and Key
Create a service account for GA4 integration and copy its email address.
From the Keys tab, select "Add Key" and then "Create new key." Create it as JSON type and download it.
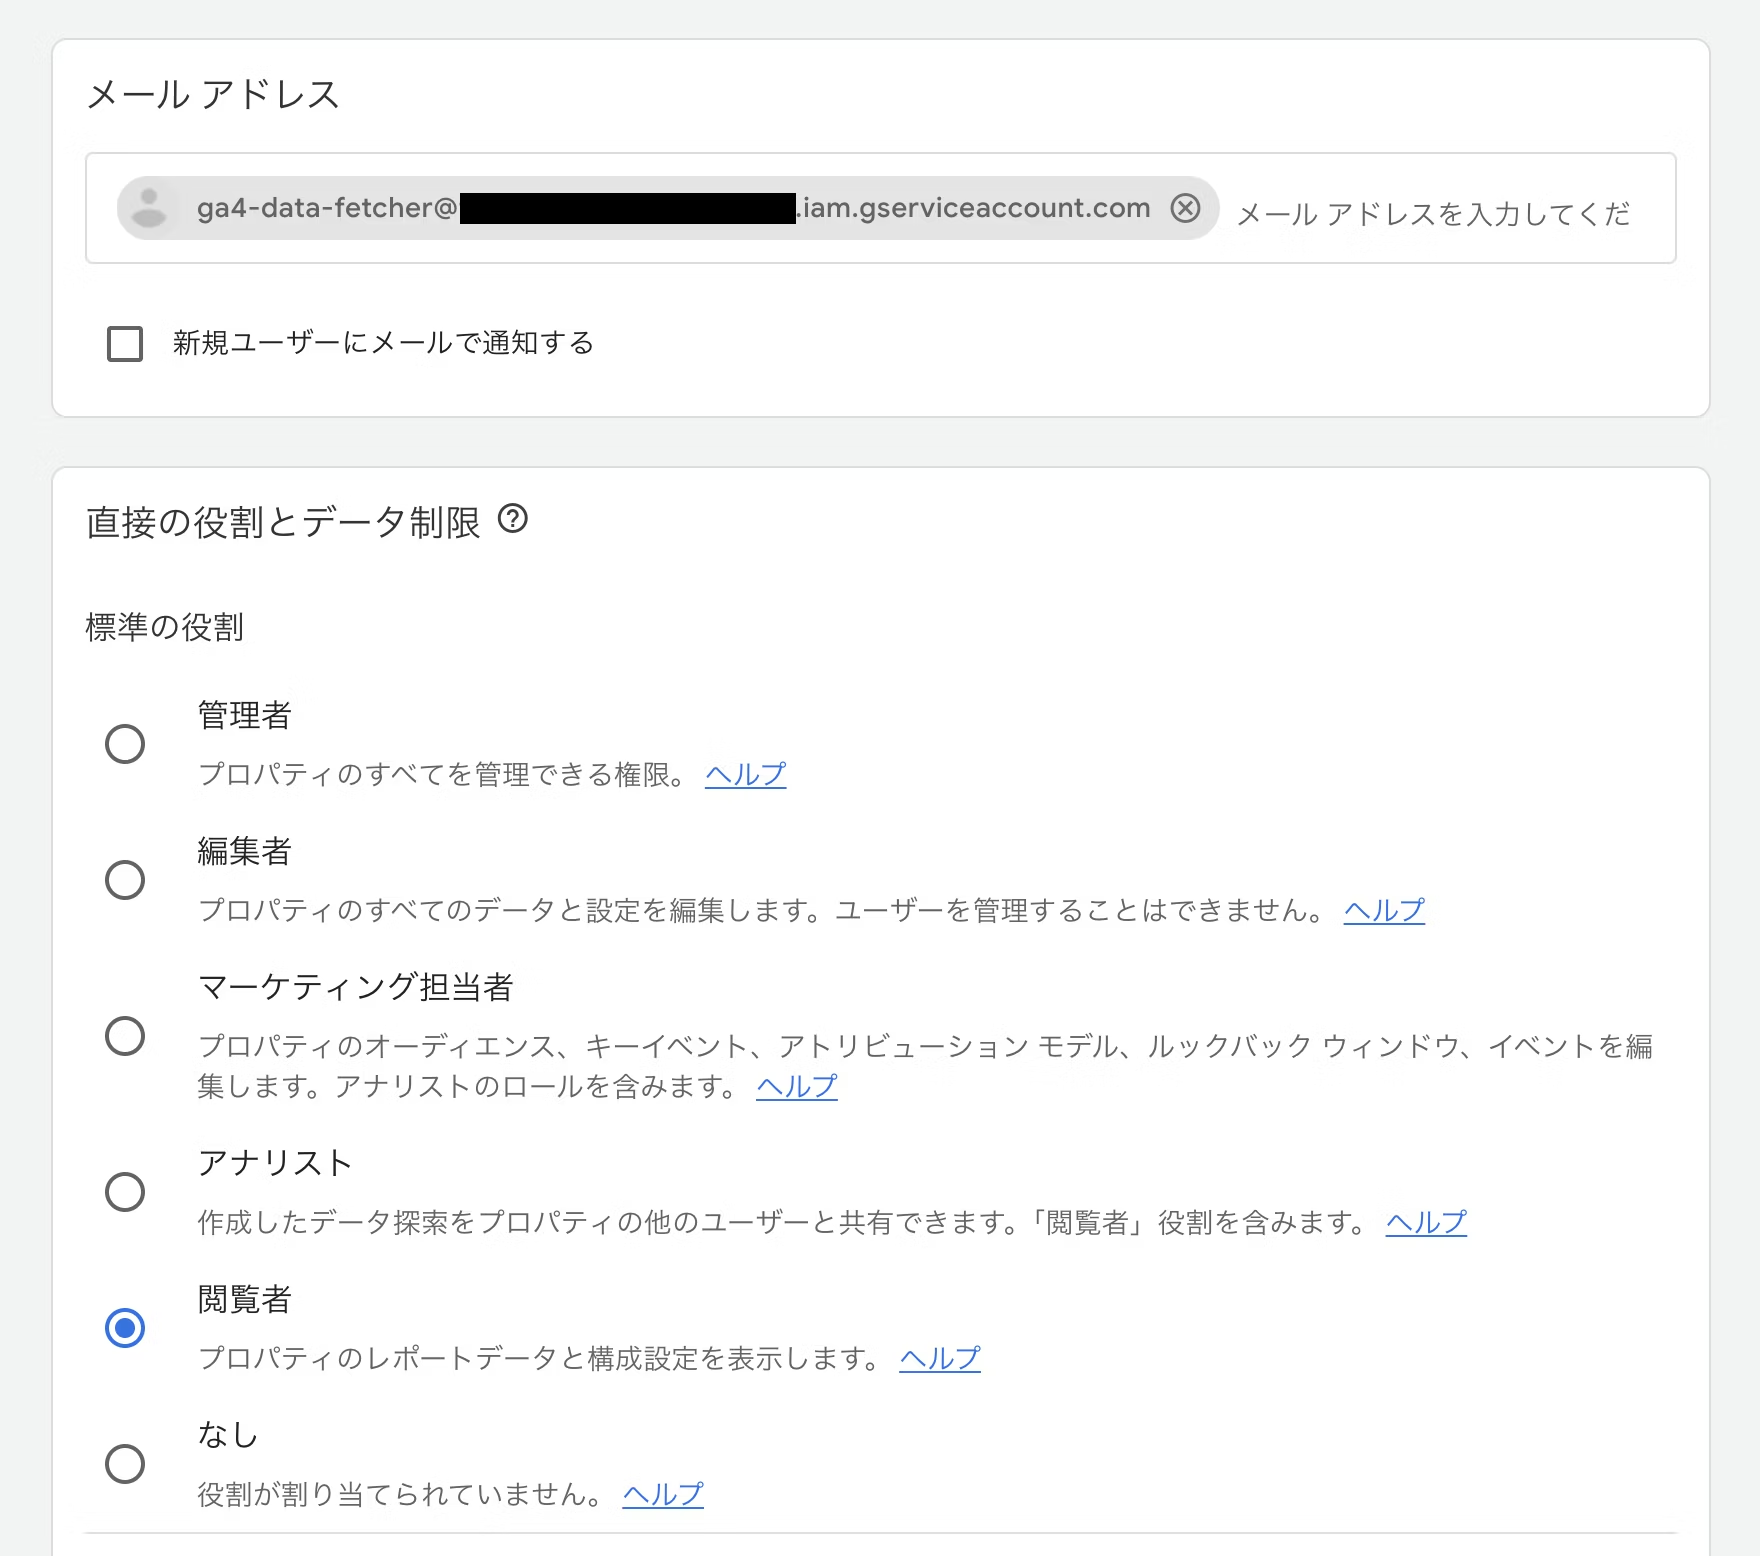
2-3. Grant GA4 Permissions
In your GA4 property's "Access Management," add the email address from step 2-2 as a user and grant "Viewer" level or higher permissions.
Step 3: Create and Configure Cloudflare Workers (GA4 Data Retrieval)
3-1. Creating a Worker and Setting Environment Variables
Create a new Worker with a name like ga4-ranking-updater.
Set environment variables from the settings. Register keys as secrets.
MICROCMS_API_KEY | microCMS API key |
|---|---|
MICROCMS_API_URL | https://[ID].microcms.io/api/v1 |
GA4_PROPERTY_ID | GA4 property ID |
GA4_SERVICE_ACCOUNT_CREDENTIALS | Entire contents of the JSON key file |
GA4_PRIVATE_KEY_BASE64 | The private_key value from the JSON with |
3-2. GA4 Data Update Worker
From "Edit code", update the contents of worker.js as follows.
const MICROCMS_ENDPOINT_NAME = '[記事のエンドポイント名]';

let contentIdToSlugMap = {};

// ----------------------------------------------------------------------
// 1. microCMSから全記事のIDとスラッグを取得し、マップを作成する
// ----------------------------------------------------------------------
async function fetchContentMap(env) {
    const apiEndpoint = `${env.MICROCMS_API_URL}/${MICROCMS_ENDPOINT_NAME}`;
    const slugToIdMap = {};
    let offset = 0;
    const limit = 100;

    while (true) {
        const url = `${apiEndpoint}?fields=id,slug&limit=${limit}&offset=${offset}`;
        const response = await fetch(url, {
            headers: { 'X-MICROCMS-API-KEY': env.MICROCMS_API_KEY },
        });
        if (!response.ok) {
            throw new Error(`microCMS Map Fetch Error: ${response.status} ${await response.text()}`);
        }
        const data = await response.json();

        data.contents.forEach(item => {
            if (item.slug && item.id) {
                slugToIdMap[item.slug] = item.id;
            }
        });
        if (data.contents.length < limit || data.totalCount <= (offset + limit)) {
            break;
        }
        offset += limit;
    }

    contentIdToSlugMap = slugToIdMap;
    console.log(`microCMSから合計 ${Object.keys(slugToIdMap).length} 件の記事IDマップを取得しました。`);
}

// ----------------------------------------------------------------------
// 2. JWT 認証ヘルパー関数群 (GA4 アクセストークン取得用)
// ----------------------------------------------------------------------
// Base64Url エンコード/デコード
const base64UrlEncode = (data) => btoa(String.fromCharCode(...new Uint8Array(data))).replace(/\\+/g, '-').replace(/\\//g, '_').replace(/=+$/, '');
const base64UrlDecode = (data) => Uint8Array.from(atob(data.replace(/-/g, '+').replace(/_/g, '/')), c => c.charCodeAt(0));

async function importPrivateKey(keyBase64) {
    // 秘密鍵本体をデコードし、DER形式のバイナリにする
    const binaryDer = base64UrlDecode(keyBase64);

    return crypto.subtle.importKey(
        'pkcs8',
        binaryDer,
        { name: 'RSASSA-PKCS1-v1_5', hash: 'SHA-256' },
        false,
        ['sign']
    );
}

// GA4 Service Accountの認証情報からAccess Tokenを取得するメイン関数
async function getAccessToken(credentialsString, privateKeyBodyBase64) {
    // 認証情報JSONをパースし、client_emailを取得
    const creds = JSON.parse(credentialsString);
    const serviceAccountEmail = creds.client_email;

    const now = Math.floor(Date.now() / 1000);
    const expiry = now + 3600; // 有効期限: 1時間後
    const header = { alg: 'RS256', typ: 'JWT' };
    const payload = {
        iss: serviceAccountEmail,
        scope: '<https://www.googleapis.com/auth/analytics.readonly>',
        aud: '<https://oauth2.googleapis.com/token>',
        exp: expiry,
        iat: now,
    }

    // 2. 署名するデータ(Header.Payload)を作成
    const encodedHeader = base64UrlEncode(new TextEncoder().encode(JSON.stringify(header)));
    const encodedPayload = base64UrlEncode(new TextEncoder().encode(JSON.stringify(payload)));
    const signatureInput = `${encodedHeader}.${encodedPayload}`;

    // 3. 秘密鍵をインポートし、JWTに署名
    const key = await importPrivateKey(privateKeyBodyBase64);
    const signature = await crypto.subtle.sign(
        { name: 'RSASSA-PKCS1-v1_5' },
        key,
        new TextEncoder().encode(signatureInput)
    );
    const encodedSignature = base64UrlEncode(new Uint8Array(signature));

    // 4. JWTを完成させる
    const jwt = `${signatureInput}.${encodedSignature}`;

    // 5. Googleトークンエンドポイントへリクエスト
    const tokenResponse = await fetch('<https://oauth2.googleapis.com/token>', {
        method: 'POST',
        headers: {
            'Content-Type': 'application/x-www-form-urlencoded',
        },
        body: new URLSearchParams({
            grant_type: 'urn:ietf:params:oauth:grant-type:jwt-bearer',
            assertion: jwt,
        }),
    });

    if (!tokenResponse.ok) {
        throw new Error(`Token request failed: ${tokenResponse.status} ${await tokenResponse.text()}`);
    }

    const tokenData = await tokenResponse.json();
    return tokenData.access_token; // アクセストークンを返す
}

// ----------------------------------------------------------------------
// 3. GA4 データ取得関数
// ----------------------------------------------------------------------
async function fetchGa4Data(accessToken, propertyId) {
    const apiEndpoint = `https://analyticsdata.googleapis.com/v1beta/properties/${propertyId}:runReport`;

    const response = await fetch(apiEndpoint, {
        method: 'POST',
        headers: {
            'Authorization': `Bearer ${accessToken}`,
            'Content-Type': 'application/json',
        },
        body: JSON.stringify({
            dateRanges: [{ startDate: '30daysAgo', endDate: 'yesterday' }], // 昨日から30日間で取得する(必要に合わせて変更)
            dimensions: [{ name: 'pagePath' }],
            metrics: [{ name: 'screenPageViews' }],
            orderBys: [{ metric: { metricName: 'screenPageViews' }, desc: true }],
            limit: 100, // 100件以降の記事はPV0として処理する(必要に合わせて変更)
        }),
    });

    if (!response.ok) {
        throw new Error(`GA4 API Error: ${response.status} ${await response.text()}`);
    }

    const data = await response.json();

    const pvData = data.rows?.map(row => ({
        pagePath: row.dimensionValues[0].value,
        pageView: parseInt(row.metricValues[0].value, 10),
    })) || [];

    return pvData;
}

// ----------------------------------------------------------------------
// 4. microCMS コンテンツID解決関数
// ----------------------------------------------------------------------
// `/blog/記事スラッグ/`という構造の場合(必要に合わせて変更)
function resolveContentIdFromPath(pagePath) {
    try {
        const cleanPath = new URL('<https://dummy.com>' + pagePath).pathname;
        const parts = cleanPath.split('/').filter(p => p.length > 0);

        // 1. '/blog/ID' の構造であるか確認
        if (parts.length < 2 || parts[0] !== 'blog') {
            return null;
        }

        const slug = parts[1];

        // マップを使って、スラッグからコンテンツIDを取得
        const actualContentId = contentIdToSlugMap[slug];

        if (!actualContentId) {
             // マップに存在しない(microCMSに記事が存在しない)場合は無視
             console.log(`[IGNORE] Slug ${slug} not found in microCMS map.`);
             return null;
        }

        // microCMSのコンテンツIDを返す
        console.log(`[RESOLVED] Slug ${slug} -> ID: ${actualContentId}`);
        return actualContentId;

    } catch (e) {
        console.error(`Path parsing error for ${pagePath}: ${e}`);
        return null;
    }
}

// ----------------------------------------------------------------------
// 5. microCMS コンテンツ更新関数
// ----------------------------------------------------------------------
async function updateMicroCMS(pvData, env) {
    let updatedCount = 0;
    const errors = [];

    // 1. GA4データをスラッグをキーとするマップに変換
    const ga4SlugPvMap = {};
    pvData.forEach(item => {
        const slug = item.pagePath.split('/').filter(p => p.length > 0)[1];
        if (slug) {
            ga4SlugPvMap[slug] = item.pageView;
        }
    });

    // 2. microCMSの全記事マップ (contentIdToSlugMap) をループ
    for (const slug in contentIdToSlugMap) {
        if (contentIdToSlugMap.hasOwnProperty(slug)) {

            const actualContentId = contentIdToSlugMap[slug];

            // 2で取得したGA4のデータにあればその値、なければ 0 を設定 (リセット)
            const newPageView = ga4SlugPvMap[slug] || 0;

            // PATCHリクエストのURLを構築
            const microcmsUrl = `${env.MICROCMS_API_URL}/${MICROCMS_ENDPOINT_NAME}/${actualContentId}`;

            const updatePayload = {
                pageView: newPageView,
                lastUpdatedPV: new Date().toISOString()
            };

            const response = await fetch(microcmsUrl, {
                method: 'PATCH',
                headers: {
                    'Content-Type': 'application/json',
                    'X-MICROCMS-API-KEY': env.MICROCMS_API_KEY,
                },
                body: JSON.stringify(updatePayload),
            });

            if (response.ok) {
                updatedCount++;
            } else {
                errors.push({ contentId: actualContentId, status: response.status, body: await response.text() });
            }
        }
    }

    if (errors.length > 0) {
        console.error(`microCMS Update Errors: ${JSON.stringify(errors)}`);
    }

    console.log(`microCMSのコンテンツ ${updatedCount} 件を更新しました。`);
    return updatedCount;
}

// ----------------------------------------------------------------------
// 6. Workerのメインハンドラー (Cron Triggers用)
// ----------------------------------------------------------------------
export default {
    async scheduled(controller, env, ctx) {
        try {
            console.log('--- GA4 Ranking Updater Started ---');

            // 1. microCMSからIDマップを事前取得
            await fetchContentMap(env);

            // 2. GA4 Access Tokenの取得
            const accessToken = await getAccessToken(
                env.GA4_SERVICE_ACCOUNT_CREDENTIALS,
                env.GA4_PRIVATE_KEY_BASE64
            );

            // 3. GA4データ取得
            const pvData = await fetchGa4Data(accessToken, env.GA4_PROPERTY_ID);
            console.log(`GA4から ${pvData.length} 件のデータを取得しました。`);

            // 4. microCMSコンテンツの更新
            const updatedCount = await updateMicroCMS(pvData, env);

            console.log(`microCMSのコンテンツ ${updatedCount} 件を更新しました。`);
            console.log('--- GA4 Ranking Updater Finished ---');

        } catch (error) {
            console.error('致命的なエラーが発生しました:', error);
        }
    }
};
Main logic of the Worker code:
- Pre-fetch mapping: Pre-fetches a map of all article
idandslugvalues from microCMS. - Fetch GA4 data: Retrieves cumulative page views from the past 30 days.
- Update logic: If GA4 has data, updates with the new page view count; otherwise, resets page views to
0.
3-3. Cron configuration (data updates)
Set the Cron trigger in the configuration's trigger event to 0 15 * * *. This runs daily at midnight and syncs the previous day's data to microCMS.
Step 4: Creating and configuring Cloudflare Workers (build trigger)
4-1. Creating Workers and setting environment variables
To separate data updates from deployment, create a Workers script dedicated to site builds with a name like build-trigger.
Set the CLOUDFLARE_PAGES_BUILD_HOOK environment variable to your Cloudflare Pages build hook URL.
4-2. Worker code (build trigger)
We'll implement code to send POST requests to the Pages build hook.
export default {
  async scheduled(controller, env, ctx) {
      // 環境変数からビルドフックURLを取得
      const buildHookUrl = env.CLOUDFLARE_PAGES_BUILD_HOOK;

      if (!buildHookUrl) {
          console.error("FATAL: CLOUDFLARE_PAGES_BUILD_HOOK environment variable is not set.");
          return;
      }

      // 2. ビルドフックURLにPOSTリクエストを送信
      const response = await fetch(buildHookUrl, {
          method: 'POST',
          headers: {
              'Content-Type': 'application/json',
          },
      });

      // 3. 結果の確認
      if (response.ok) {
          console.log("✅ Cloudflare Pages Build Triggered Successfully.");
      } else {
          console.error(`❌ Build Trigger Failed! Status: ${response.status} ${response.statusText}`);
      }
  },
};
4-3. Cron configuration (site deploy)
In the trigger event settings, configure the Cron trigger as 10 15 * * *. Since we want to run this after the process in step 3 completes, we'll schedule deployment to start daily at 12:10 AM with a 10-minute buffer.
Summary
While this approach lacks the immediacy of a dedicated ranking API, a 10-minute delay is well within acceptable limits. The major benefits are the cost efficiency of not consuming API quota and being able to run within Cloudflare's free tier, plus the simplicity of keeping everything within Cloudflare!


A "master of technique" who jumped from DTP into the web world and, before he knew it, mastered markup, frontend, direction, and accessibility. Active across multiple domains since Liberogic's early days, he's now a walking encyclopedia within the company. Recently, he's been diving deep into prompt-driven efficiency optimization, wondering "Can we rely more on AI for accessibility compliance?" Both his technology and thinking continue to evolve.
Futa
IAAP Certified Web Accessibility Specialist (WAS) / Markup Engineer / Frontend Engineer / Web Director